Understanding why venting a portable AC is essential
Why Proper Venting Matters for Portable Air Conditioners
When using a portable air conditioner, venting is not just a technical detail—it’s essential for the unit’s performance and your comfort. The main job of a portable AC is to cool indoor air by removing heat and humidity. But if the hot air isn’t directed outside through a hose and vent kit, it will simply recirculate back into the room. This makes the air conditioner work harder, reduces efficiency, and can even increase your electricity bill. Proper venting ensures that the hot exhaust air leaves your space, allowing the portable AC to deliver the cooling you expect.
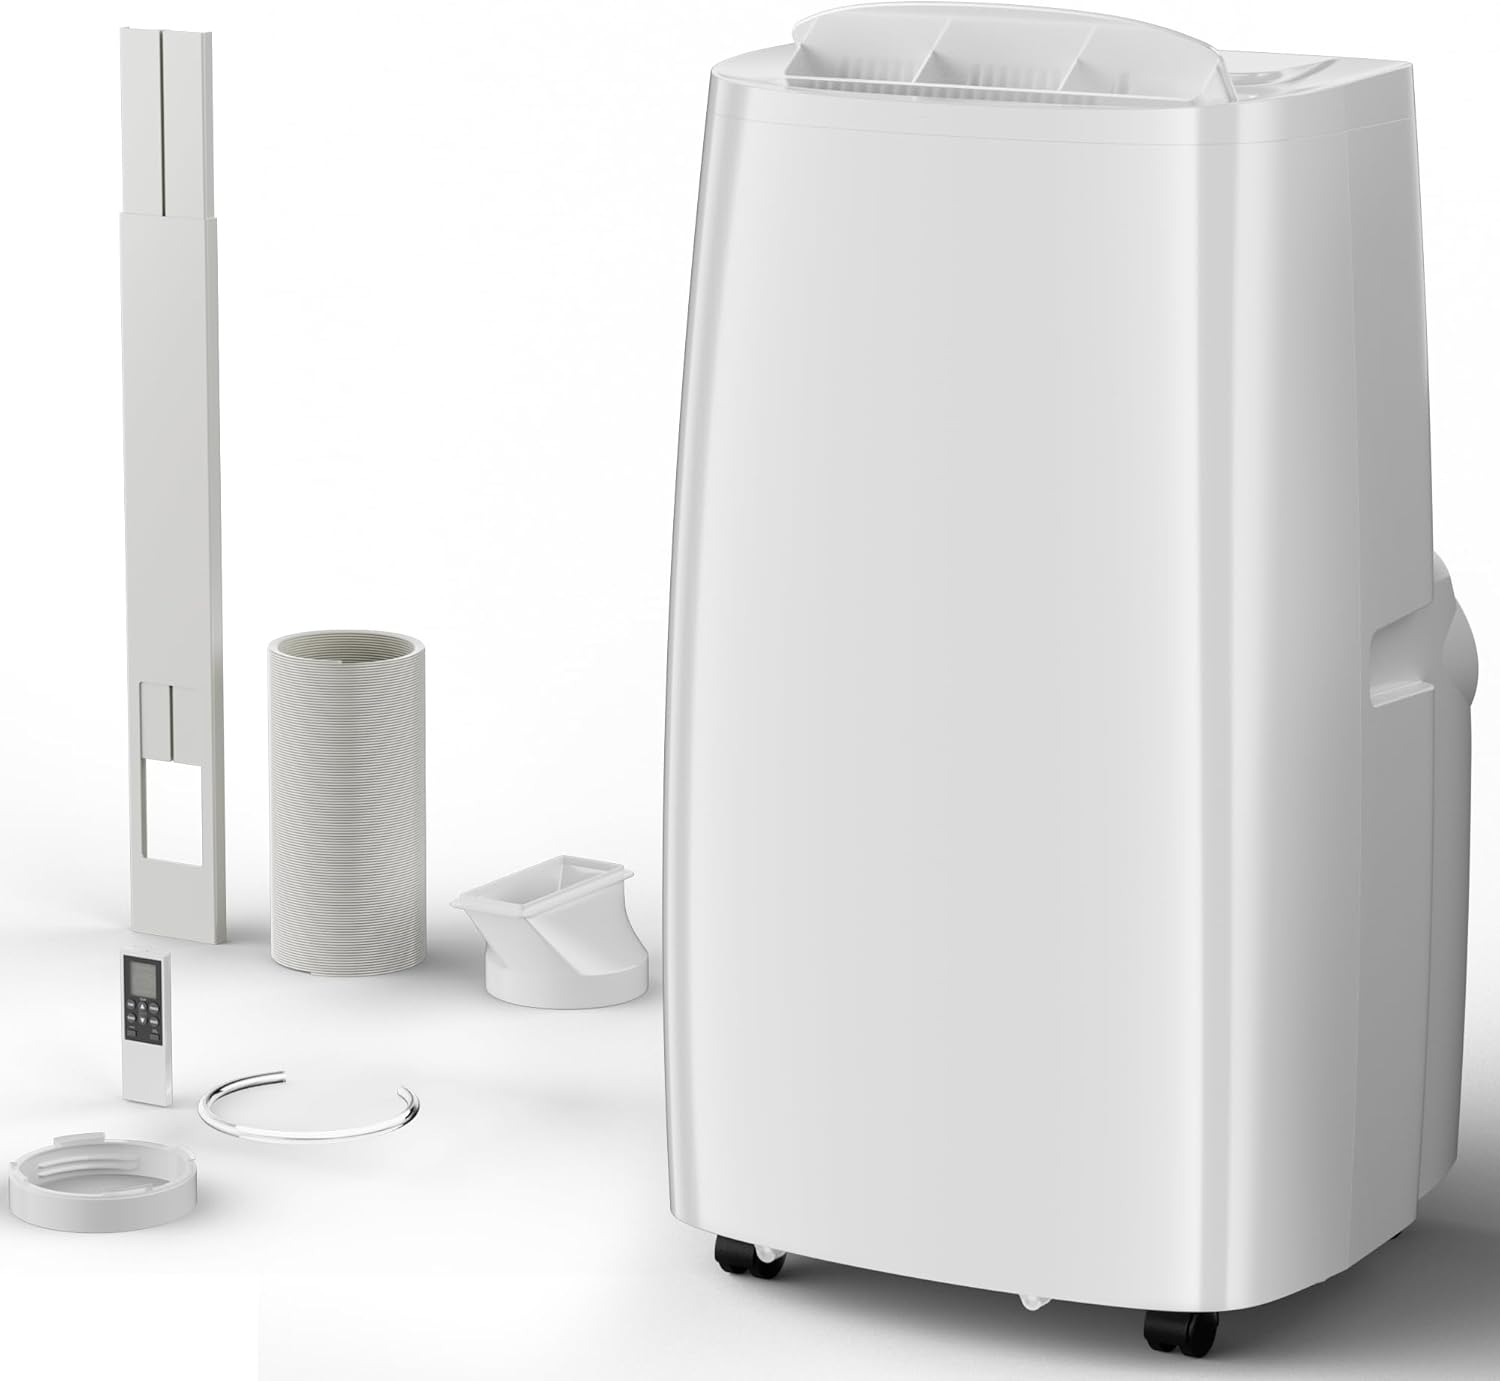
- Exhaust hose: This is the main channel for hot air to exit. It connects the portable unit to the outside via a window, sliding door, or other venting option.
- Window kit: Most portable air conditioners come with a window vent kit, which typically includes an adjustable plate or panel to fit standard and sliding windows. This helps seal the opening and direct the exhaust outside.
- Seal and coupler: A good seal around the vent plate or hose coupler prevents warm air and insects from sneaking back inside, keeping the cooling efficient.
Ignoring venting or using a poor setup can lead to common mistakes, like leaks around the window kit or using an exhaust hose that’s too long or kinked. These issues can reduce cooling power and even damage the product over time. If you’re dealing with tricky spaces or sliding windows, there are alternative venting solutions and adjustable kits designed to fit different setups. The role of flexible ducting in portable air conditioners is also worth understanding, especially if you need to extend or adapt your venting system.
Ultimately, investing in the right vent kit and maintaining a proper seal will help your portable air conditioner deliver its typical cooling performance, regardless of the price or model. Efficient venting is the foundation for comfort and energy savings with any portable exhaust system.
Common venting options for portable air conditioners
Popular Ways to Vent a Portable Air Conditioner
When setting up a portable air conditioner, venting is a crucial step for effective cooling. The main goal is to expel hot air from the room, and the most typical method is through a window. However, there are several venting options available, each with its own benefits and challenges.- Window Venting: Most portable air conditioners come with a window kit that includes an adjustable plate, hose coupler, and exhaust hose. The kit is designed to fit sliding windows and can often be adapted for different window sizes. A good seal is essential to prevent warm air from leaking back inside. For those looking to boost efficiency, consider using vent covers to further insulate the window vent.
- Sliding Door Venting: For larger spaces or rooms with sliding doors, there are adjustable vent kits specifically made for doors. These kits work similarly to window kits but are longer and can be sealed with weatherstripping to maintain efficiency.
- Wall Venting: Some users opt to vent their portable air conditioner through a wall. This method requires cutting a hole and installing a vent plate, which is more permanent but can be a good solution if window or door venting isn’t possible.
- Drop Ceiling or Dryer Vent: In commercial spaces or basements, venting through a drop ceiling or an existing dryer vent is sometimes an option. Always check compatibility with your product and ensure the exhaust hose fits securely with the coupler.
Key Considerations for Choosing a Venting Method
- Hose Length and Diameter: Most portable exhaust hoses are between 5 and 7 feet long and about 5 to 6 inches in diameter. Using the shortest possible hose helps maintain cooling efficiency.
- Seal Quality: Whether using a window kit, door plate, or wall vent, a tight seal is vital to prevent air leaks and maintain the performance of your portable air conditioner.
- Adjustability: Look for adjustable window kits and plates that can fit a range of window or door sizes. This flexibility is especially important for sliding windows and doors.
- Price and Compatibility: Not all vent kits are universal. Check that the kit matches your air conditioner’s hose coupler and fits your window or door type. Some kits are sold separately from the main product, so factor this into your total price.
Step-by-step guide to venting through a window
Preparing your window and gathering the right vent kit
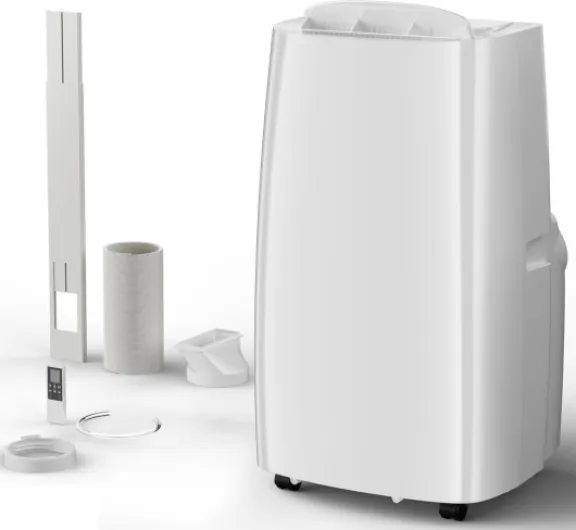
Before starting, check your portable air conditioner’s manual for the recommended vent kit and hose size. Most portable air conditioners come with a window kit, which typically includes an adjustable plate, hose coupler, and exhaust hose. These kits are designed to fit standard sliding windows, but some can be adapted for casement or vertical windows. Make sure you have all the necessary parts, including the window seal, before proceeding. If your window is larger or smaller than typical, you may need to purchase an additional adjustable window kit or extension plate. Prices for these kits can vary, so compare options based on your window type and the product’s compatibility.
Installing the exhaust hose and window kit
- Open your window and place the adjustable window plate into the gap. Adjust the plate so it fits snugly, minimizing any open space. For sliding windows, the plate should run vertically; for sash windows, position it horizontally.
- Connect the hose coupler to the window plate. Most kits use a twist-and-lock or snap-in design for the coupler, ensuring a secure fit for the exhaust hose.
- Attach the exhaust hose to the back of your portable air conditioner. Make sure the hose is straight and not kinked, as bends can restrict airflow and reduce efficiency.
- Connect the other end of the hose to the coupler on the window plate. Double-check that all connections are tight to prevent warm air from leaking back into the room.
- Seal any gaps around the window plate using the included foam strips or a window seal kit. This step is crucial for maintaining efficiency and keeping hot air out.
Testing and optimizing your venting setup
Once everything is connected, close the window tightly against the plate. Turn on your portable air conditioner and check for any leaks around the vent kit. If you notice warm air entering the room, adjust the seal or reposition the plate. For sliding windows or doors, ensure the plate is firmly in place and the seal is intact. Some users find that using an additional window seal kit improves insulation and efficiency, especially in older or drafty windows.
For more details on how self-evaporating portable air conditioners can simplify cooling and venting at home, check out this in-depth guide to self-evaporating AC units.
| Component | Purpose | Typical Price Range |
|---|---|---|
| Exhaust hose | Directs hot air outside | $15–$40 |
| Window kit (plate + seal) | Fits hose to window opening | $20–$60 |
| Hose coupler | Connects hose to plate | Usually included in kit |
| Adjustable window plate | Adapts to window size | Included or $10–$25 separately |
| Window seal kit | Improves insulation | $10–$30 |
Alternative venting solutions for tricky spaces
Venting Without a Standard Window: What Are Your Options?
Not every space has a typical window for venting a portable air conditioner. If you’re dealing with sliding windows, doors, or even rooms without windows, you still have several ways to set up your portable AC for efficient cooling.- Sliding Windows and Doors: Many portable air conditioners come with an adjustable window kit that can fit sliding windows or even sliding doors. These kits usually include a plate that you can cut or adjust to the right size. The exhaust hose connects to the plate using a hose coupler, creating a tight seal to prevent warm air from coming back inside. Make sure the kit is compatible with the width of your window or door and that the seal is snug to maximize efficiency.
- Through-the-Wall Venting: If you have a wall that leads outside, you can install a vent kit directly through it. This method requires cutting a hole that matches the diameter of your exhaust hose (usually 5 to 6 inch). Use a proper coupler and sealant to ensure no air leaks. This is a more permanent solution, but it’s effective for rooms without windows.
- Ceiling or Drop Ceiling Venting: In offices or basements with drop ceilings, you can vent the portable air conditioner through a ceiling tile. Replace a tile with a vent plate and connect the exhaust hose. Make sure the air is being directed to a space that won’t cause heat buildup elsewhere.
- Chimney or Dryer Vent: Some users repurpose an existing dryer vent or unused chimney flue. If you go this route, check that the vent is clean and unobstructed. Use a compatible hose coupler and seal any gaps to prevent leaks.
Key Considerations for Alternative Venting
- Seal Quality: No matter which method you choose, a tight seal around the vent kit and hose is essential. Gaps can let warm air back in, reducing the efficiency of your portable air conditioner.
- Compatibility: Check the diameter of your exhaust hose and the size of the vent kit or plate. Most portable window kits are adjustable, but always confirm the fit before purchasing a product.
- Price and Installation: Alternative venting solutions can vary in price. Some kits are designed specifically for sliding windows or doors, while others may require custom adjustments. Factor in the cost of additional materials like sealant or couplers.
Common mistakes to avoid when venting a portable AC
Frequent Errors That Reduce Cooling Efficiency
When venting a portable air conditioner, small mistakes can lead to big drops in performance and higher energy bills. Here are some of the most typical issues to watch out for:- Poor window kit installation: If the window kit or sliding plate isn’t sealed tightly, warm air from outside can leak in. This makes your portable AC work harder, raising the price of operation and reducing cooling power.
- Incorrect exhaust hose setup: Kinking or sharply bending the exhaust hose restricts airflow. Make sure the hose is as straight and short as possible, and avoid compressing it behind furniture or against the wall.
- Using the wrong coupler or hose size: Not all portable air conditioners use the same diameter hose. Using a hose coupler or kit that doesn’t fit your model can cause leaks or poor venting. Always check the product specifications for the correct inch measurement.
- Improper sealing around sliding windows or doors: Gaps around the window vent or sliding door plate let hot air back in. Use foam seals or weatherstripping to close off any spaces for maximum efficiency.
- Vent placement errors: Venting portable air conditioners into closed spaces like attics or garages recirculates hot air, defeating the purpose. Always vent to the outdoors through a window, sliding window, or door using the appropriate kit portable solution.
How to Avoid These Mistakes
- Double-check that your window kit and adjustable window plate fit snugly in your window or sliding windows.
- Inspect the exhaust hose regularly for blockages, bends, or damage.
- Use only manufacturer-recommended hose portable and coupler accessories for your air conditioner model.
- Seal any gaps with the included foam or purchase extra weatherstripping if needed.
- Make sure your vent kit exhaust leads directly outside and not into another room or enclosed area.
Tips for maintaining your portable AC’s vent system
Keeping the exhaust hose and vent kit in top shape
Regular maintenance of your portable air conditioner’s vent system is crucial for both efficiency and longevity. The exhaust hose, window kit, and coupler all play a role in how well your unit removes hot air from your space. Here are some practical tips to keep everything working smoothly:- Inspect the hose and coupler: Check the portable exhaust hose for any cracks, bends, or blockages. A damaged hose can leak hot air back into your room, reducing the effectiveness of your air conditioner. Make sure the hose coupler is securely attached and not loose.
- Clean the vent and window kit: Dust and debris can build up around the window vent and sliding plate. Wipe down these areas regularly to prevent airflow restrictions. If your kit includes an adjustable window plate, ensure it slides easily and seals tightly.
- Check the seal: The seal between the window kit and the window (or sliding door) is essential for keeping hot air out. Inspect the seal for gaps or wear, especially if you move the portable air conditioner between rooms. Replace worn seals to maintain efficiency.
- Monitor for condensation: Some portable air conditioners produce condensation that can collect around the vent or hose. If you notice moisture, dry the area and check for leaks. Persistent moisture may indicate a problem with the exhaust system or the product’s drainage.
- Store components properly: If you remove the vent kit or hose portable for storage, keep all parts together in a dry place. Avoid bending the exhaust hose sharply, as this can cause cracks or reduce its lifespan.