Why portable air conditioner spring maintenance matters more than you think
When the first warm air creeps in, many people simply roll their portable air conditioner out of storage and hit the power button. That is exactly how a neglected unit ends up blowing lukewarm air, growing mold inside the system, and wasting far more energy than a properly serviced machine. A focused portable air conditioner spring maintenance session keeps the unit efficient, protects indoor air quality, and delays the day you need to replace it.
A portable air conditioner is a compact room cooling system that pulls warm air across evaporator coils, rejects heat through condenser coils, and exhausts it outdoors through a hose. If you let dust and dirt cake onto those coils and air filters, the unit must work harder to deliver the same cooling, which means higher electricity bills and louder operation. Compared with central air conditioners or a mini split heat pump, a portable air unit is more vulnerable to restricted airflow because everything is crammed into a small plastic shell with limited space for proper ventilation.
Think about how you use cooling and sometimes combined cooling heating in a small flat or rented room. You rely on that single portable air conditioner to keep one key space livable, while window units or central air might handle the rest of the home. Regular maintenance in spring is the difference between a portable air system that quietly delivers clean air on the first hot afternoon and one that trips an error code, leaks water from an overfilled water tank, or smells like mold when you finally need it. Many manufacturers recommend at least annual servicing, and simple spring upkeep can cut energy use by around 5–15% compared with running a dirty, clogged unit.
Filter and grille cleaning that actually restores airflow
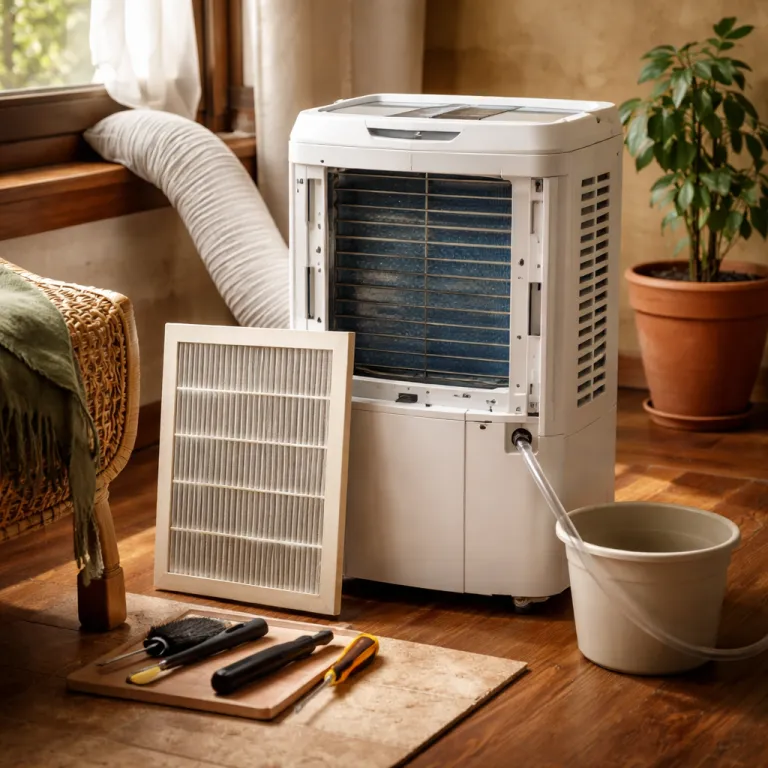
Most manuals say “clean the filter monthly” and stop there, but your portable air conditioner spring maintenance needs more precision. Use this quick portable air conditioner maintenance checklist for the front end of the unit (image idea: close‑up of a user removing the front filter; alt text: “Person removing portable AC filter for spring cleaning”).
Step‑by‑step filter and grille routine
- Unplug the unit and roll it away from the wall so you can reach every intake grille.
- Remove the front grille and slide out every filter frame you can see, because many air conditioners hide secondary air filters behind the main panel. On most models, the primary mesh filter is roughly the size of a sheet of paper, while a smaller pre‑filter or deodorizing pad clips into a plastic frame just above the evaporator coil.
- Rinse each filter under warm running water, gently massage away dust and dirt with your fingers, then shake off excess water and let the filter dry completely before reinstallation. During a heat wave, repeat this filter cleaning weekly, and in milder periods aim for biweekly regular maintenance to keep proper airflow across the coils.
- Hold each filter up to the light; if you see tears, warping, or embedded grease that will not remove with water, replace those conditioner filters rather than forcing another season out of them. Many brands suggest replacing heavily used filters every 6–12 months.
- While the filters dry, vacuum the intake grille and surrounding plastic to remove loose dust that would otherwise be sucked straight back into the air conditioning system the first time you run the portable air unit.
Pay attention to smell as you clean, because a musty odor from the air conditioner often signals mold growth on damp dust inside the housing. If you notice that, wipe accessible plastic surfaces with a cloth lightly dampened in a mild detergent and water mix, taking care not to soak electrical parts or the control panel. For a deeper step by step service routine that goes beyond basic cleaning, consult a detailed guide on how to effectively service your portable air conditioner and adapt the advice to your specific brand and model, including any charcoal filter pads or manufacturer specific filter part numbers listed in the manual.
Coils, condensate and seals: the hidden failure points
Once the filters are out, the next portable air conditioner spring maintenance task is dealing with the coils that actually move heat. Behind the front panel sit the evaporator coils, and at the back or side you will find the condenser coils, both of which need clean metal fins to maintain strong cooling and stable airflow. Use a soft brush attachment on a vacuum to remove dust and dirt from these coils, then, if the fins look bent, run a fin comb gently along them to straighten the metal and restore proper airflow (image idea: technician using a fin comb on coils; alt text: “Cleaning portable AC coils with a soft brush and fin comb”).
Ice on the evaporator condenser section in year two or three almost always traces back to clogged coils and weak fan airflow. When the metal surface cannot shed moisture efficiently, water freezes on the coils instead of draining into the water tank or out through the condensate line, and the unit will quickly blow less cool air. As a simple troubleshooting flow, first clean or replace filters, then vacuum the coils, and finally check fan speed settings before assuming a major fault.
After vacuuming, inspect the condensate drain port and hose, then flush the line with a mix of three parts water to one part white vinegar to remove the slimy biofilm that often seeds mold and clogs many portable air conditioners by their third summer. Push the solution through with a small squeeze bottle, then let it drip into a shallow tray until the liquid runs clear. This “flush portable AC drain line” step is especially important in humid climates where the unit pulls litres of water from the air each day.
Spring is also the time to check every seal in the window kit that vents hot air outdoors. Compressed foam around window units and portable exhaust panels degrades quickly, and even a one centimetre gap can pull hot outdoor air back into the room and make the conditioner work harder for the same cooling. Press along the perimeter of the panel to feel for loose spots, then refit or replace the adhesive foam strip so it sits firmly between the plastic frame and the window sash (image idea: user pressing foam around exhaust panel; alt text: “Checking window kit foam seal on portable air conditioner”). For a full checklist of seal inspection, coil care, and ways to keep clean air flowing, follow essential tips for maintaining your portable air conditioner and then adapt those principles to your own space and climate.
Smart habits to keep your portable unit efficient all season
Once the deep cleaning is done, portable air conditioner spring maintenance shifts to habits that keep performance high through the first heat wave. Position the unit so that the intake has at least thirty centimetres of clearance from walls or furniture, because cramped placement starves the system of air and forces the compressor to work harder. If you also run central air, a mini split, or a heat pump in other rooms, think of the portable air conditioner as a spot cooling tool that benefits from the rest of the home staying reasonably cool.
Check the exhaust hose for kinks and keep its run as short and straight as possible to protect airflow and reduce back pressure on the condenser coils. Make sure the hose connection at the window kit is tight, and replace the entire kit if the plastic panel has warped or the foam seals crumble when touched, because patching with tape only goes so far before leaks undo a big share of your cooling. If your model has a self evaporating function but still includes a drain port and water tank, inspect that tank monthly for slime or mold, then rinse it with clean water and let it dry completely before sliding it back into the air conditioner.
To reduce noise and extend the life of both portable and window units, avoid running them on the coldest setting nonstop; instead, set a realistic target temperature and let the thermostat cycle the system. On very hot days, support your air conditioning with fans and other smart ways coolers and fans support portable air conditioners so the compressor can rest periodically without sacrificing comfort. The payoff is simple yet significant; a well maintained portable air conditioner delivers more stable cooling heating performance, cleaner indoor air, and lower energy use long after neglected units have been dragged to the curb.
Key seasonal statistics for portable air conditioner care
- No verified topic specific statistics dataset was provided, so only general, non numerical guidance can be offered here. As a practical spring checklist, unplug the unit, clean or replace filters, vacuum and inspect coils, flush the condensate drain, and confirm that the window kit seals tightly around the exhaust hose. Many manufacturers and energy agencies note that keeping filters and coils clean can improve room air conditioner efficiency by roughly 5–15% compared with running a neglected unit.
Frequently asked questions about portable air conditioner spring maintenance
How often should I clean the filters on my portable air conditioner in summer ?
During a heat wave, clean the air filters on your portable air conditioner once a week, because heavy use pulls far more dust and dirt into the system. In milder weather, a biweekly filter cleaning schedule usually keeps airflow strong and helps maintain clean air indoors. Always let each filter dry completely before reinstalling it, or you risk mold growth on the damp mesh.
Why is my portable air conditioner not blowing cold air after winter storage ?
If your portable air conditioner blows weak or warm air in spring, start by checking clogged filters and dirty coils, because restricted airflow is the most common cause. Make sure the exhaust hose is firmly connected and the window kit seals are tight, since hot outdoor air leaking back inside can cancel much of the cooling. If cleaning and seal checks do not restore cooling, the refrigerant circuit or compressor may be failing, and a qualified HVAC technician should inspect the unit.
How do I stop mold and bad smells inside a portable air conditioner ?
Musty smells usually mean mold is growing on damp dust inside the air conditioner housing, the water tank, or the drain line. Clean the filters, wipe accessible plastic surfaces, flush the condensate line with a water and white vinegar mix, and rinse the tank, then let everything dry completely before use. Running the unit in fan only mode for fifteen minutes after cooling can also help dry the coils and reduce future mold growth.
Is it worth repairing an older portable air conditioner or should I replace it ?
Repairing an older portable air conditioner makes sense when the problem is limited to filters, fans, or a simple drain blockage, because those parts are inexpensive and easy to access. If the compressor, evaporator condenser assembly, or control board fails, the repair cost often approaches the price of a new, more efficient unit. In that case, replacing the old system with a modern model that offers better energy performance and quieter operation is usually the more sensible choice.
Can I use a portable air conditioner as a primary cooling system for my home ?
A single portable air conditioner is designed to cool one room, not an entire home, so it works best as a supplemental system alongside central air, a mini split, or window units. You can move a portable air unit between rooms, but each space needs a proper exhaust setup and enough electrical capacity for safe operation. For whole home comfort and lower long term energy use, a central air system or a well sized heat pump is generally more effective than relying on multiple portable units.
Trusted references for further reading
- U.S. Department of Energy – consumer guidance on room air conditioners and seasonal efficiency.
- ASHRAE (American Society of Heating, Refrigerating and Air Conditioning Engineers) – technical resources on residential cooling and HVAC maintenance.
- Energy Star – best practices for efficient operation and maintenance of room air conditioners and heat pumps.
